...
We have two scripts available for download depending on your scenario.
Scenario 1:
Target client has a domain and on premise DC with Automate agent installed and the DC is located within that client/location.
For this scenario - download the script standard Agent Configuration - Join PC to Domain (2.
...
2).
...
If still on Automate 2021.5 or lower you can still
| Info |
|---|
Recently the script has been updated to use Powershell instead of Automate commands to determine current computer name. This means you no longer need to use Agent Configuration - Join PC to Domain (2.0) |
...
if you are on Automate 2021.5 or older. |
Setup
...
Unzip to folder on your computer or the Automate server.
Open Control Center client - to import go to System>General>Import>XML Expansion.
Browse to the xml file and then click Open. Then click Yes to import.Next
Verify import in the Control Center>Automation>Scripts>View Scripts and search for Join PC which should return any current or older versions of the script you may have.
If this your first time to import any Join PC script from this website - reload system cache then
with the MSP Toolshed Portal - add the new script to your configuration profile(s)
as needed.
If you previously had downloaded the Agent Configuration - Join PC to Domain (2.1) script from this website - that existing script will be updated upon clicking Yes to import. You should only see Agent Configuration - Join PC to Domain (2.
Once the profile has been saved, the next deployment using that profile will perform the Join Domain function.
Usage
The Join Domain script will automatically join the domain found in the Automate Client where the agent was installed (This is set in the OneTouch Deployment). As long as you only have a single domain in this client, it will find an online domain controller to perform the join function.
2) remaining. If that is the case - no further steps needed - your Configuration Profiles previously holding the 2.1 script item should be automatically updated to show the new title as the GUID value remains the same.
If you see both the old 2.1 and the 2.2 version - reload system cache then with the MSP Toolshed Portal - remove the older script and add the 2.2 script item to your configuration profile(s) as needed. Delete the older script(s) entirely from the Control Center.
Scenario 2:
a) Target client has multiple domains and on premise DCs with Automate agents installed and you need to select a specific domain (perhaps they have child or other domains for testing and development that are not the primary domain machines need to join)
b) Target client has single domain but no on premise DC in their client/location but the desired on premise DC resides in another client/location that does have Automate agent installed. For example there are 10 Automate clients that are affiliated but their DC resides at only 1 Client/Location. You can have agents in the other 9 client/locations join the specific domain.
For this scenario - download Agent Configuration - Join PC to Specific Domain (2.2) template. It is a template so designed where you make a copy and fill out the fulldomain as global variable.
Setup
Unzip to folder on your computer or the Automate server.
Open Control Center client - to import go to System>General>Import>XML Expansion.
Browse to the xml file and then click Open. Then click Yes to import.
Verify import in the Control Center>Automation>Scripts>View Scripts
Usage
Control Center>Automation>Scripts>View Scripts - search for Join PC. The template should be returned in the search results.
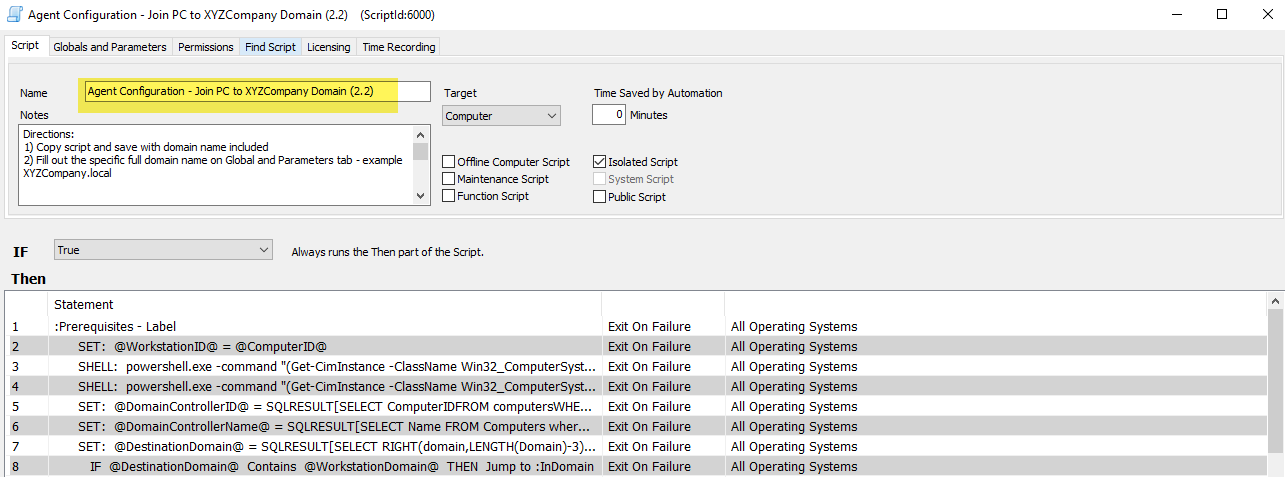
Right click and choose Duplicate. It will open script with Name of
Copy of Agent Configuration - Join PC to Specific Domain (2.2) template
Update Name field to:
Agent Configuration - Join PC to XYZCompany domain (2.2) for exampleFill out the specific full domain name on Global and Parameters tab - example XYZCompany.local
Save script and reload system cache then with the MSP Toolshed Portal - add the new script created from template to your configuration profile(s) as needed.
| Attachments | ||
|---|---|---|
|


