Configuration Profiles allow you to assemble sequences of tasks that you want to run/apply to a machine in order to achieve the desired Client PC configuration. These tasks includes Profile Settings, Power Settings and Profile Items.
Configuration Profiles page

Menu Bar options:
New | Select to create a new configuration profile. |
Edit | Select an existing configuration profile - then click Edit to make changes. |
Duplicate | Select an existing configuration profile - then click Duplicate to create a copy which will default to “Profile Name - Copy” as Profile Name. |
Delete | Select an existing configuration profile - then click Delete. You will be prompted to confirm deletion. |
Import | Click Select File to browse to and select desired Automate XML script export. Only profile scripts created by the Toolshed plugin are allowed. |
Column Chooser | Selecting allows you to choose which columns to display. Example 4 of the 7 available columns are displayed. 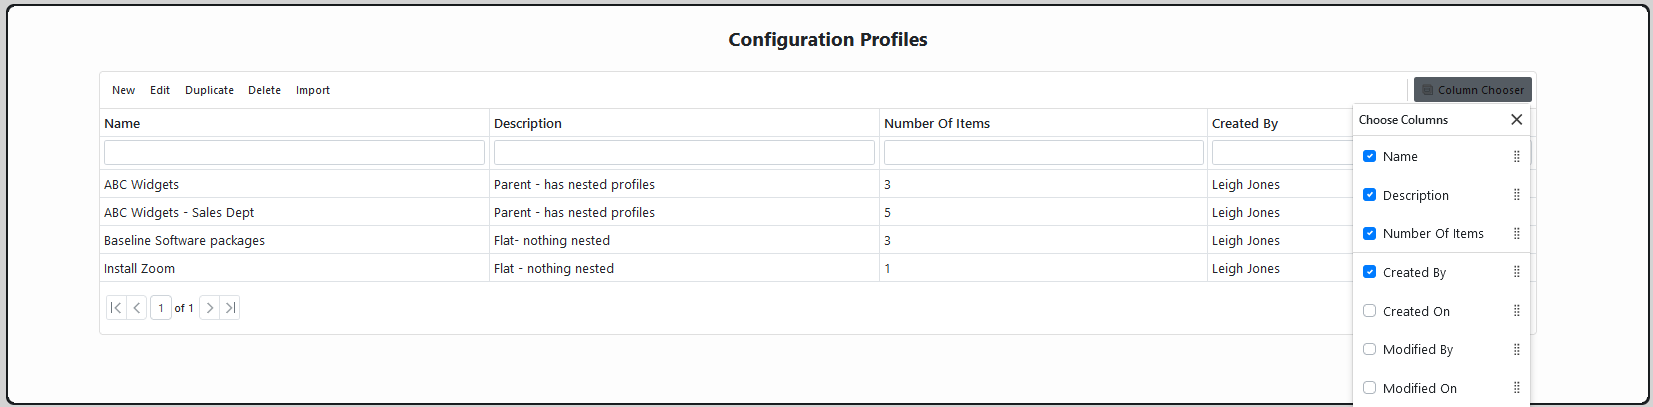 |
Filter Row | This allows you to search/filter based on the available column data. Example searching for profiles with the Name ABC  |
Group by Column | Drag a column header to the designated area to group by that column such as group by Name 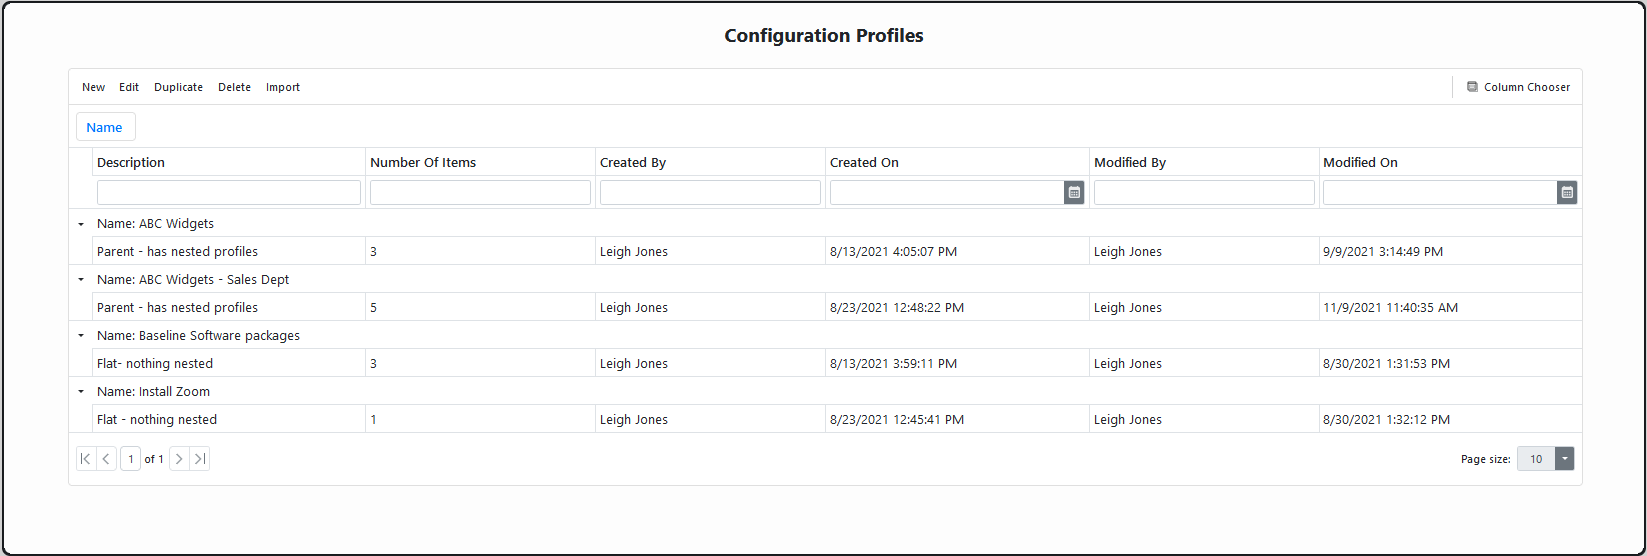 |
Configuration Profile components

1. Profile - Information

Profile Name | Name for profile - will display on both the Deployments listing as well as in Configuration Profiles listing |
Profile Description | Description of profile and components |
2. Profile - Options

Install all available Windows and Build Updates | If enabled will install all available Windows and Build Updates once all other Profiles Items have been processed. Updates are installed via Windows Update API and based on eligibility determined by the Windows Update Agent. |
Power Off when finished | If enabled computer will shutdown once the entirety of profile has been processed. Note if Windows and Build Update enabled that is the final step after any agent installation and nested profiles/script items are processed. |
Keep Chocolatey Installed | If enabled the Chocolatey Agent will remain installed rather than being removed once Chocolately script items are processed. |
3. Profile - Naming Rules

Enable Naming Rule | If enabled will toggle on the Naming Rule dropdown selector. Naming Rules are only applied by parent level profiles. |
Naming Rule | Dropdown selector activated when Enable Naming Rule is toggled on. |
Add Naming Rule | Naming Rules editor can be launched directly within Configuration Profile by clicking the + icon. The new naming rule is automatically selected to use once created and submitted. See Naming Rules for detailed instructions. |
4. Profile - Build Notification

Enable Build Notification | If enabled will display notification screen on computer that is visible prior to logon prompt until build is complete. 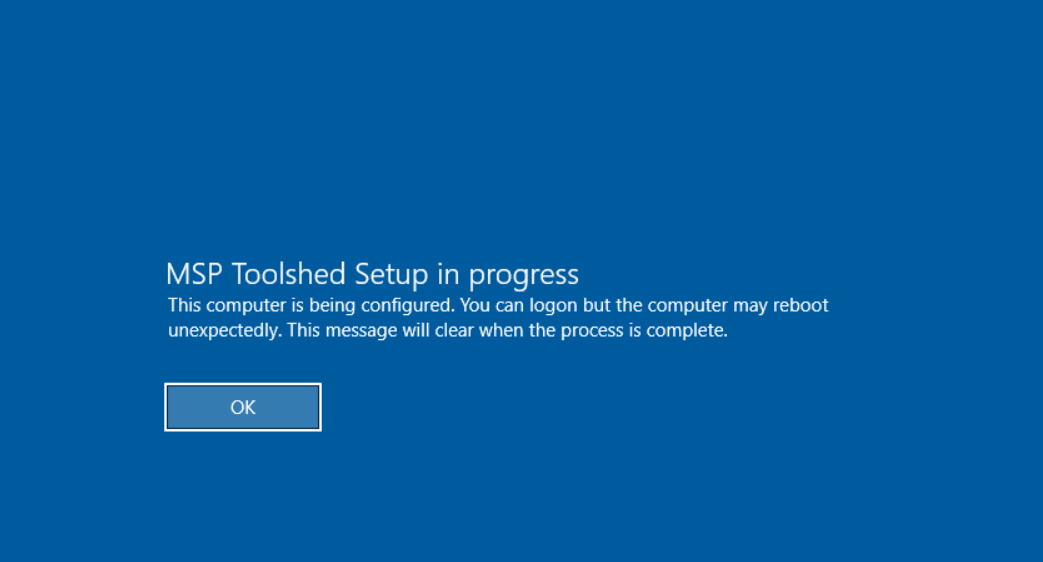 Note: The default Windows “Setup Completed Successfully” message that appears after the provisioning phase, will be replaced by the Notice Title when Build Notification is enabled. This will ensure enduser can tell the overall deployment has not fully completed.
|
5. Profile - Power Settings
MSP Toolshed disables all the power settings listed in table below while the deployment is running to ensure the computer does not go to sleep/hibernate during the process. Power Settings you select will be applied to computer at end of deployment process. Configuring with 0 min disables the setting forever.
Plugged In | Sleep (min) - default 20 |
On Battery | Sleep (min) - default 10 |
6. Profile Items

Navigation | ↕ - Click and hold, then drag and drop to move item up or down to reorder |
Legend for Item Type Icons: | 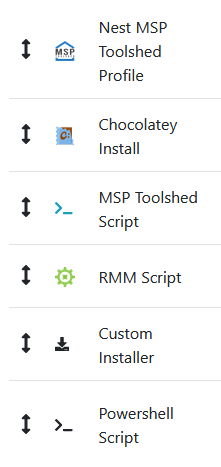 |
Item Type |
|
Item Name | Dropdown selector filtered based on Item Type selected - find desired Item Name and click Add Item button to include on Profile Items list. |
Reboot | Select to reboot once profile item has processed (not available on nested profile item) |
Applies To: | Chassis selection for item - choices are All, Laptop, and Desktop. Defaults to All. |
Timeout (min): | Select to change timeout for Chocolatey or RMM Scripts. Default is 15 min for Chocolately and 45 min for RMM. |
Configuration Profiles usage
A profile can be “Flat” where all the individual items in the sequence are at the same level of hierarchy. A profile can also be a “Parent” with nested profiles included in addition to individual items. This creates a tremendous amount of flexibility in deployment scenarios - you can build sub-profiles that contain certain actions, and a Parent profile can call specific sub-profiles in sequence. This allows sub-profiles to be reused across multiple similar deployment scenarios so that you don’t have to reproduce the same work/steps repeatedly for similar deployment scenarios.
Example profiles

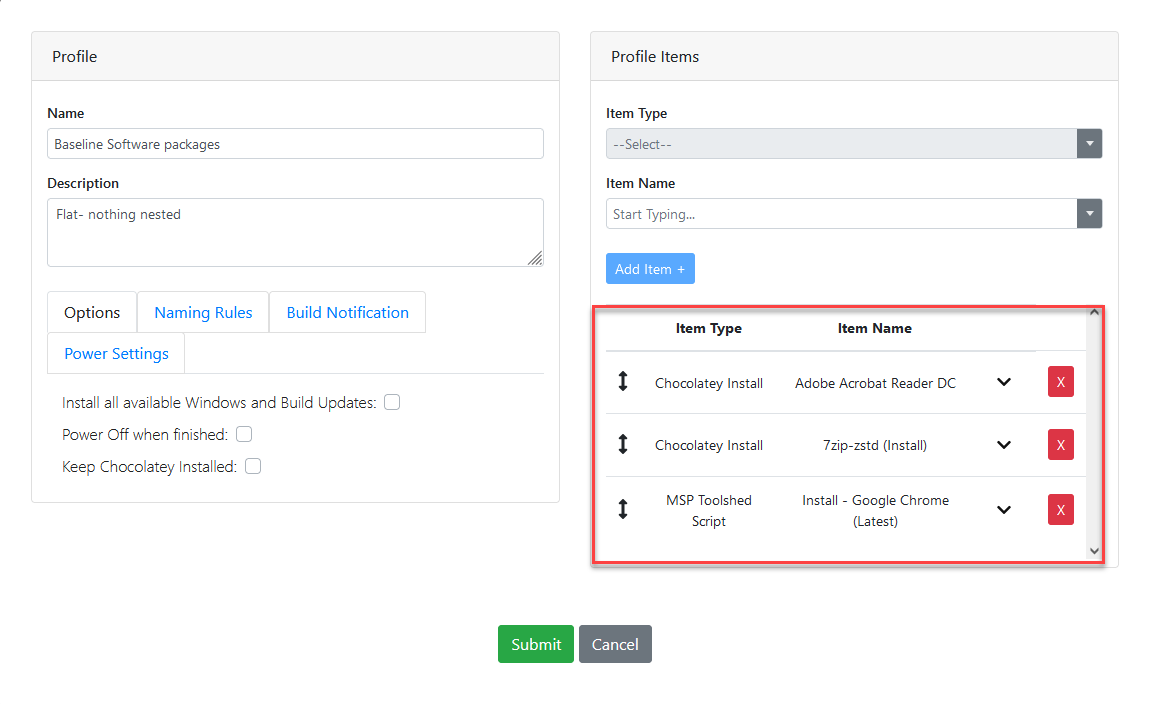
Baseline Software packages - this is “Flat” nothing nested. Contains 3 items to install as baseline across all client machines.
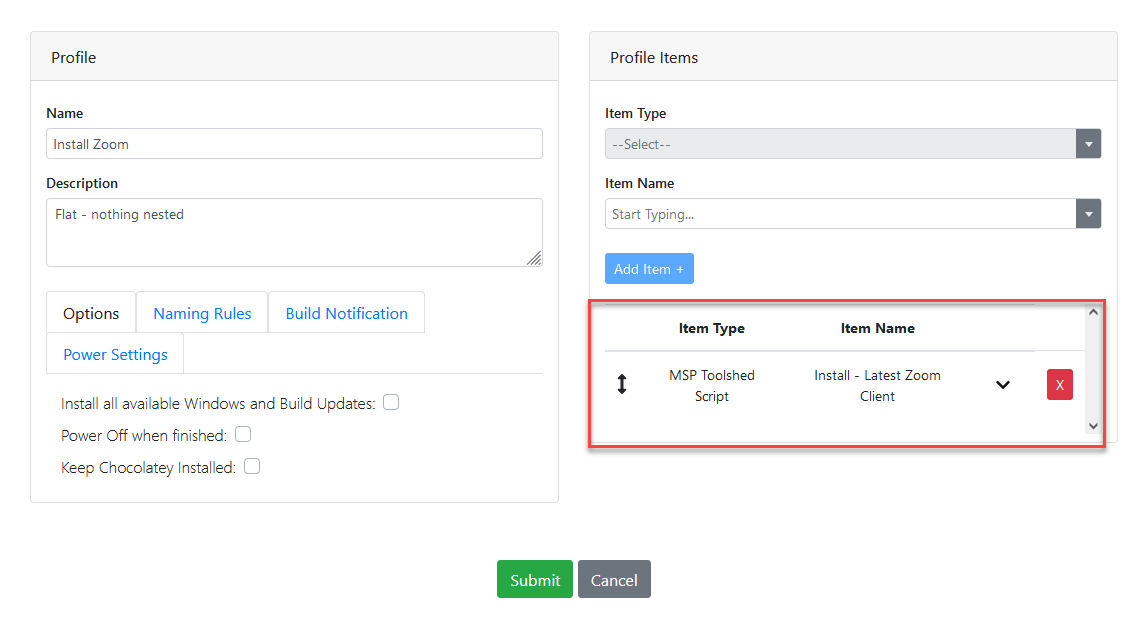
Install Zoom - this is “Flat” nothing nested. Single item to install.
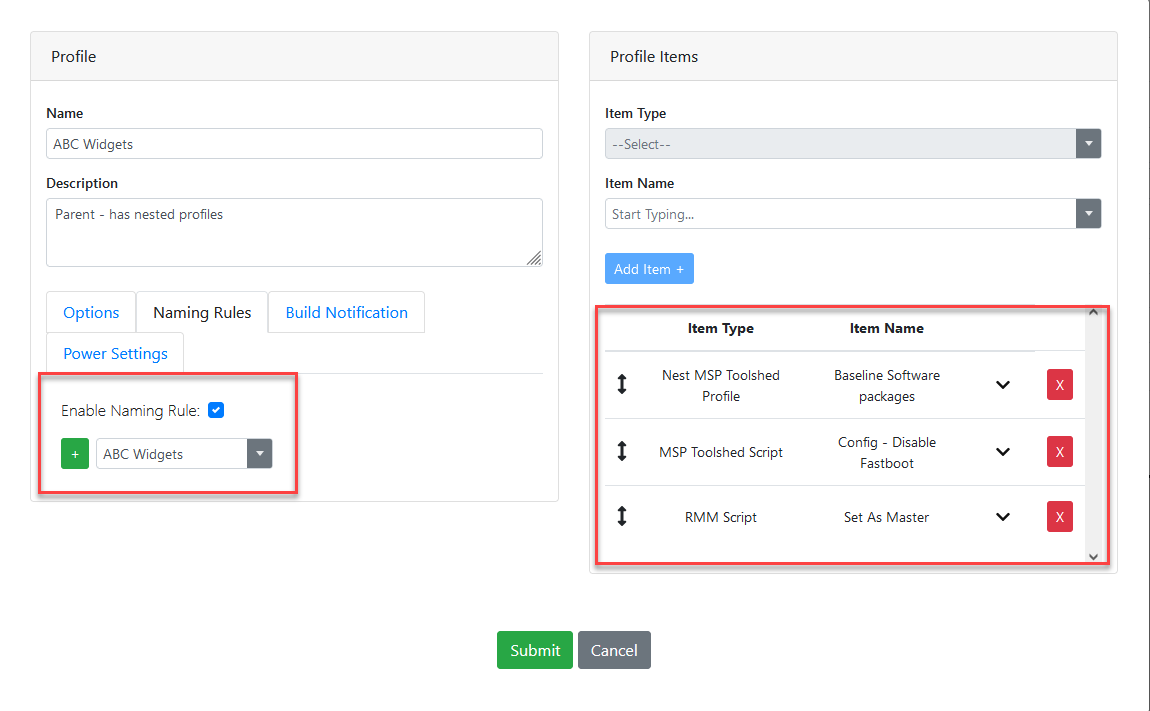
ABC Widgets - this is a “Parent” as it has a nested profile (Baseline) and two individual items. And note the Naming Rule is enabled. Naming Rules only apply when enabled on Parent/Flat profile. Only the Profile Items within a nested profile get used for deployment - the Profile Settings are only tied to Parent/Flat profile.
ABC Widgets - Sales Dept - this is also a “Parent” but with two nested profiles (Baseline and Install Zoom) along with two individual items. It was created by copying the ABC Widgets profile and adding the additional nested profile Install Zoom and placing after the Baseline nested item. Since only the Sales Dept needs Zoom installed it is easy to create profile just for their deployments. Additionally a different Naming Rule was created and applied for the Sales Dept.
